A cabinet refresh across multiple student housing properties is a logistics problem first. You have a narrow window between spring move-out and fall move-in. Your team is turning dozens or hundreds of units at once. And if materials show up late or wrong, you're stuck at the worst possible time.
This playbook covers 8 steps in three phases: planning, ordering, and install. It's built for facilities teams and housing staff who need a process that scales and repeats.
Phase 1: Planning
Step 1: Audit cabinet conditions across your portfolio
Before you order anything, walk every property and grade your cabinets. Sort units into three groups:
- Full reface: Doors are warped, peeling, stained past the point of cleaning, or dated enough to hurt leasing.
- Touch-up only: Boxes are solid but need small fixes. New hardware, a door swap, maybe some paint.
- Skip this cycle: Cabinets look fine. Save your budget for units that need it.
Student housing takes a beating. The American Apartment Owners Association says student units see up to 30% more wear than standard rentals. That means cabinet condition can vary a lot, even in the same building. Don't assume every unit needs the same work.
This audit also helps you budget. Count doors and drawer fronts per unit to get real numbers. Guessing leads to over-ordering or, worse, reorders that blow your timeline.
Step 2: Map your timeline to the academic calendar
Work backward from move-in day. Here's a rough example:
- August 15: Fall move-in
- August 8: Last install day (one week buffer for punch list and cleaning)
- July 1 to August 8: Install window (about 5 weeks)
- Mid-June: Materials need to be on-site
- Early June: Orders placed (with 5-10 business day lead times)
- May: Measurements done and orders prepped
Your dates will differ based on your campus calendar. But the method is the same. Start with the deadline and work backward, adding buffer at each stage.
The most common mistake? Treating the install window as the only constraint. Ordering, shipping, and staging all eat into that window if you don't plan for them.
If your portfolio spans campuses with different schedules, map each one on its own. A property on quarters has different move-out dates than one on semesters.
Step 3: Prioritize properties and sequence your rollout
You can't do everything at once. And you shouldn't try. Rank your properties by three things:
Cabinet condition. The worst units go first. If a prospect tours a unit with peeling doors, that's a leasing problem that costs more than the reface.
Visibility. Tour units, model units, and buildings near the leasing office get top priority. These units affect your ability to fill beds.
Move-out timing. If one property's move-out is two weeks earlier, start there. Use the staggered calendar to keep your crew busy without dead time between buildings.
Then build a sequence so your team moves building to building with no gaps. The goal: materials for Building B show up the same week your crew wraps Building A.
Phase 2: Ordering
Step 4: Pick a door style and color, then standardize
Choose one door style. Two at most. Use it across every property.
This is a business decision, not just a design choice. Here's what it does for you:
-
It makes ordering simple. One style means one SKU set, fewer variables, and less room for error.
-
It makes reorders easy. When a door gets damaged mid-year, you order the same thing. No hunting down what was in that specific unit.
-
It creates a consistent look. Your properties feel like they belong to the same brand. Parents and students notice this during tours.
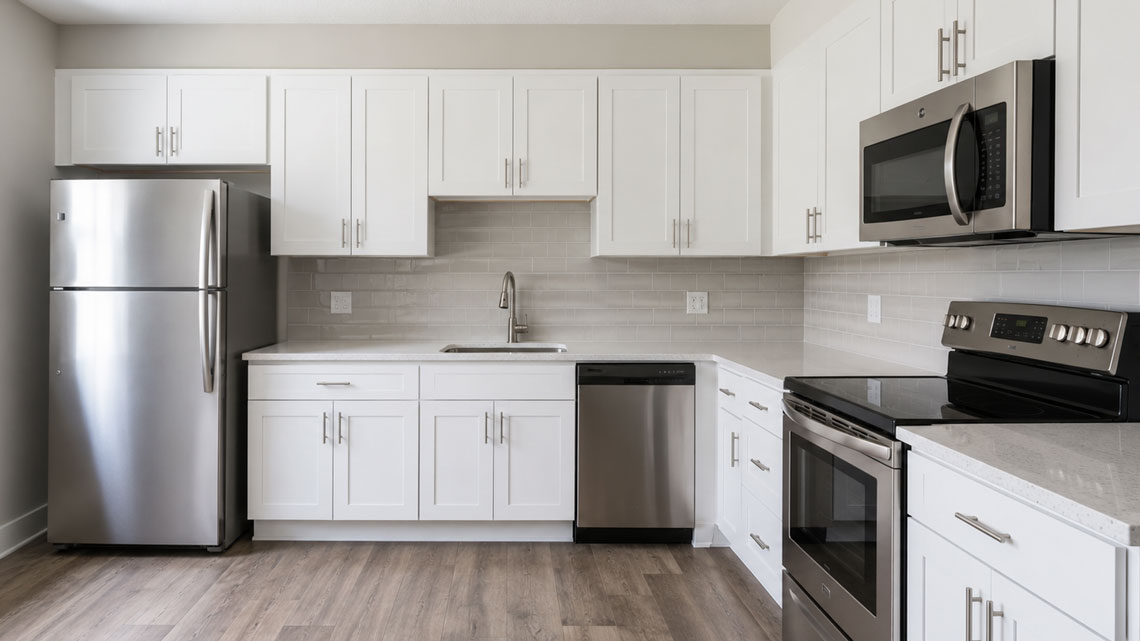
For student housing, pick finishes that are tough and easy to clean. Slab doors wipe down faster than raised-panel designs with grooves that trap grease. Light, neutral colors (white, gray, natural wood) shoot well for listings and hide minor scuffs better than dark finishes.
Qwikkit supports this approach. You can lock in a door profile and color across your whole portfolio and reorder with matching specs each cycle. But no matter which supplier you use, the point is the same: pick a style, commit, and cut the guesswork out of future refreshes.
Step 5: Measure every unit and build your order list
This step is where accuracy matters most. A wrong measurement means a wrong door. A wrong door means a reorder. A reorder means a delayed unit.
For every cabinet opening in every unit, measure:
- Width (left edge to right edge of the opening)
- Height (top edge to bottom edge)
- Overlay (how much the door overlaps the box on each side)
Do the same for drawer fronts. Don't assume cabinets in the same unit are the same size, even if they look alike. Measure each one.
Tips that save time:
-
Use a standard form or spreadsheet. Columns for property, building, unit, room, cabinet spot, width, height, overlay. This becomes your order list.
-
Put one person per property in charge of measurements. When multiple people measure different ways, mistakes pile up.
-
Most kit suppliers offer measurement guides. Qwikkit's guides walk you through the process. Use whatever your supplier provides. What matters is that your whole team measures the same way.
Step 6: Place orders on a staggered schedule
Don't order your whole portfolio at once. Stagger by building, timed to match your install sequence from Step 3.
Here's why: if everything ships at once, you need storage space. Hallways, empty units, the maintenance shop. Boxes get shuffled, parts get mixed up, and your team wastes time sorting before they can start.
Staggered orders mean each shipment arrives close to when your crew is ready for that building. Less clutter. Less sorting. Less confusion.
When picking a supplier, ask how they package multi-unit orders. Look for one that ships kits sorted by unit, not bulk pallets of loose doors. Pre-sorted kits let your crew grab a box, walk into a unit, and get to work. Qwikkit ships this way, with kits sorted by unit and room. But the key point is to ask any supplier about packaging before you commit.
Phase 3: Install
Step 7: Prep units and install
Split this into two stages, even if the same crew does both.
Prep (30-60 minutes per unit):
Take off old doors, drawer fronts, and hardware. Keep hinges if the new doors use the same type. Clean the cabinet boxes. Wipe surfaces, scrape off old adhesive, and check for damage. If a box is warped or water-damaged, flag it now. Refacing won't fix that. Then check the new kit against your order list. Make sure every part matches the right opening before you start.
Install (3-6 hours per kitchen):
Start with upper cabinets, then move to base cabinets. This keeps you from bumping lower doors while reaching overhead.
Hang doors, attach drawer fronts, put in new hardware. If you're also putting veneer or peel-and-stick laminate on the boxes, do that before you hang doors. Otherwise you'll work around them.
Two-person crews work best. One holds, one drills. Solo installs are doable but slower, and alignment suffers.
Keep a punch list for each unit as you go. Don't wait until the end to note problems. Mark doors that need tweaking, hardware that wobbles, or drawers that stick.
Step 8: QA, document, and prep for next time
Walk every finished unit before you clear it for move-in. Check:
- Door alignment (level and flush when closed?)
- Hardware (handles solid, not loose?)
- Drawers (smooth open and close, no rubbing?)
- Hinges (doors stay where you put them, no swinging or slamming?)
Fix punch-list items right away. A door that's slightly off today turns into a work order in October.
Once QA is done, document the project:
Photograph the finished units. Use these for listings, tour materials, and internal records. Shoot kitchens straight-on, doors closed, good light, counters clear.
Log what you installed where. Property, building, unit, door style, color, supplier, date. When you need a replacement door in February, this log saves you from guessing.
Write down what you'd change. Did you have enough buffer? Were the measurements right the first time? Did materials show up on schedule? Did the install sequence flow, or did your crew double back? These notes turn a one-time project into a program you can run every year.
Frequently Asked Questions
How long does cabinet refacing take per student housing unit?
Plan for 4-8 hours per kitchen with a two-person crew, using a full kit with doors, drawer fronts, and hardware. Prep adds another 30-60 minutes. Larger kitchens or odd layouts take longer. If you're also covering the cabinet boxes with veneer, add 2-3 hours.
Can you reface cabinets during the school year?
Yes, but it's harder. Your crew works in a lived-in unit. That means setting up access with the resident, covering their things, and finishing in one day so the kitchen works by evening. Most teams schedule refacing during summer turns to avoid this. But if a unit needs help mid-year, a kit-based reface is one of the faster options out there.
What door styles hold up best in student housing?
Flat slab doors and simple shaker profiles do well. They're easy to wipe down, don't have grooves that trap grease, and look clean in photos. Skip ornate raised-panel designs. They show wear faster and feel dated in student housing. For color, white, light gray, and natural wood tones are the safest bets. They're easy to match if you need to swap a single door later.
How do you keep cabinet finishes consistent across multiple properties?
Pick one supplier, one door style, and one color. Save your specs so you can reorder exact matches. If you use Qwikkit, the ordering portal lets you save setups and reorder with the same specs across your portfolio. But the bigger point: consistency is a buying decision, not an install decision. Make the choice once, write it down, and stick with it.
What's the cost difference between refacing and full cabinet replacement?
Refacing usually costs 40-60% less than full replacement. It keeps the existing boxes in place and swaps out only the doors, drawer fronts, and hardware. That means less demo, less waste, less time per unit, and no need to touch plumbing or countertops. For student housing teams working through hundreds of units on a tight clock, the time savings matter just as much as the cost savings.